
Sorting
Separate picked goods into orders. Scan the product and basket or shelf to confirm where you place each item.
Workers see on their device which product to pick, where to find it and what to pack. Managers check progress and assign tasks. Adapt picking and packing to your warehouse layout.
On the warehouse floor and in the office
A handheld terminal is a device with a barcode scanner that staff carry between the shelves. They open NOXTI tasks on it, while their manager tracks progress on a computer.
See what warehouse staff see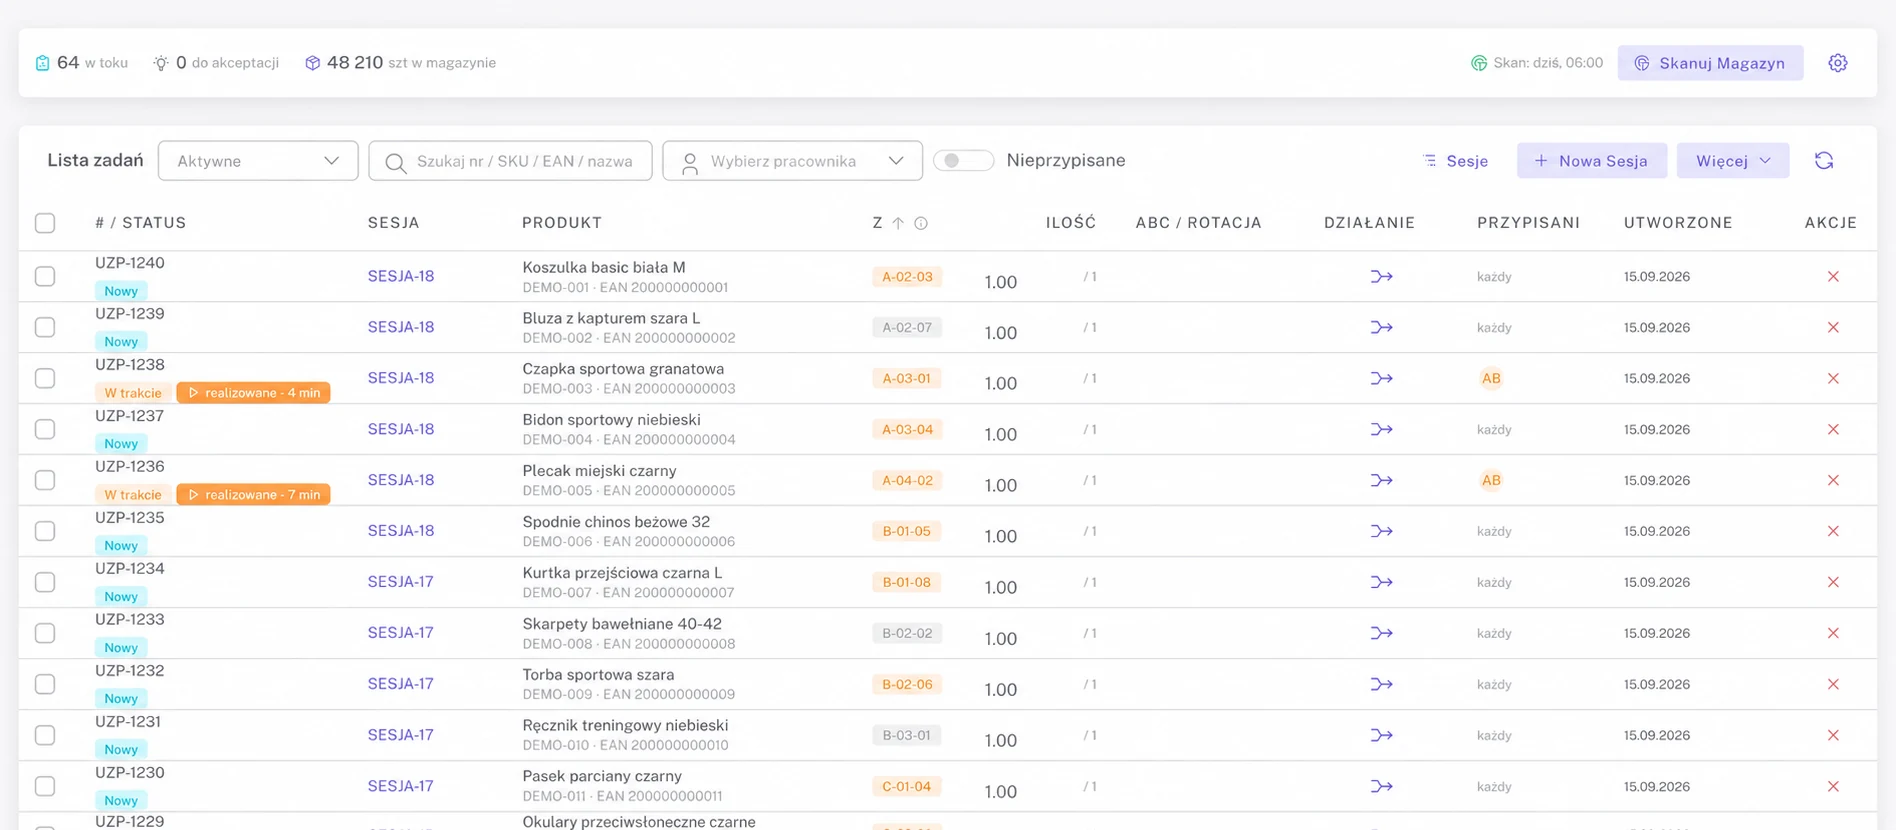
System screens in Polish. Products and codes are examples.
Goods receipt
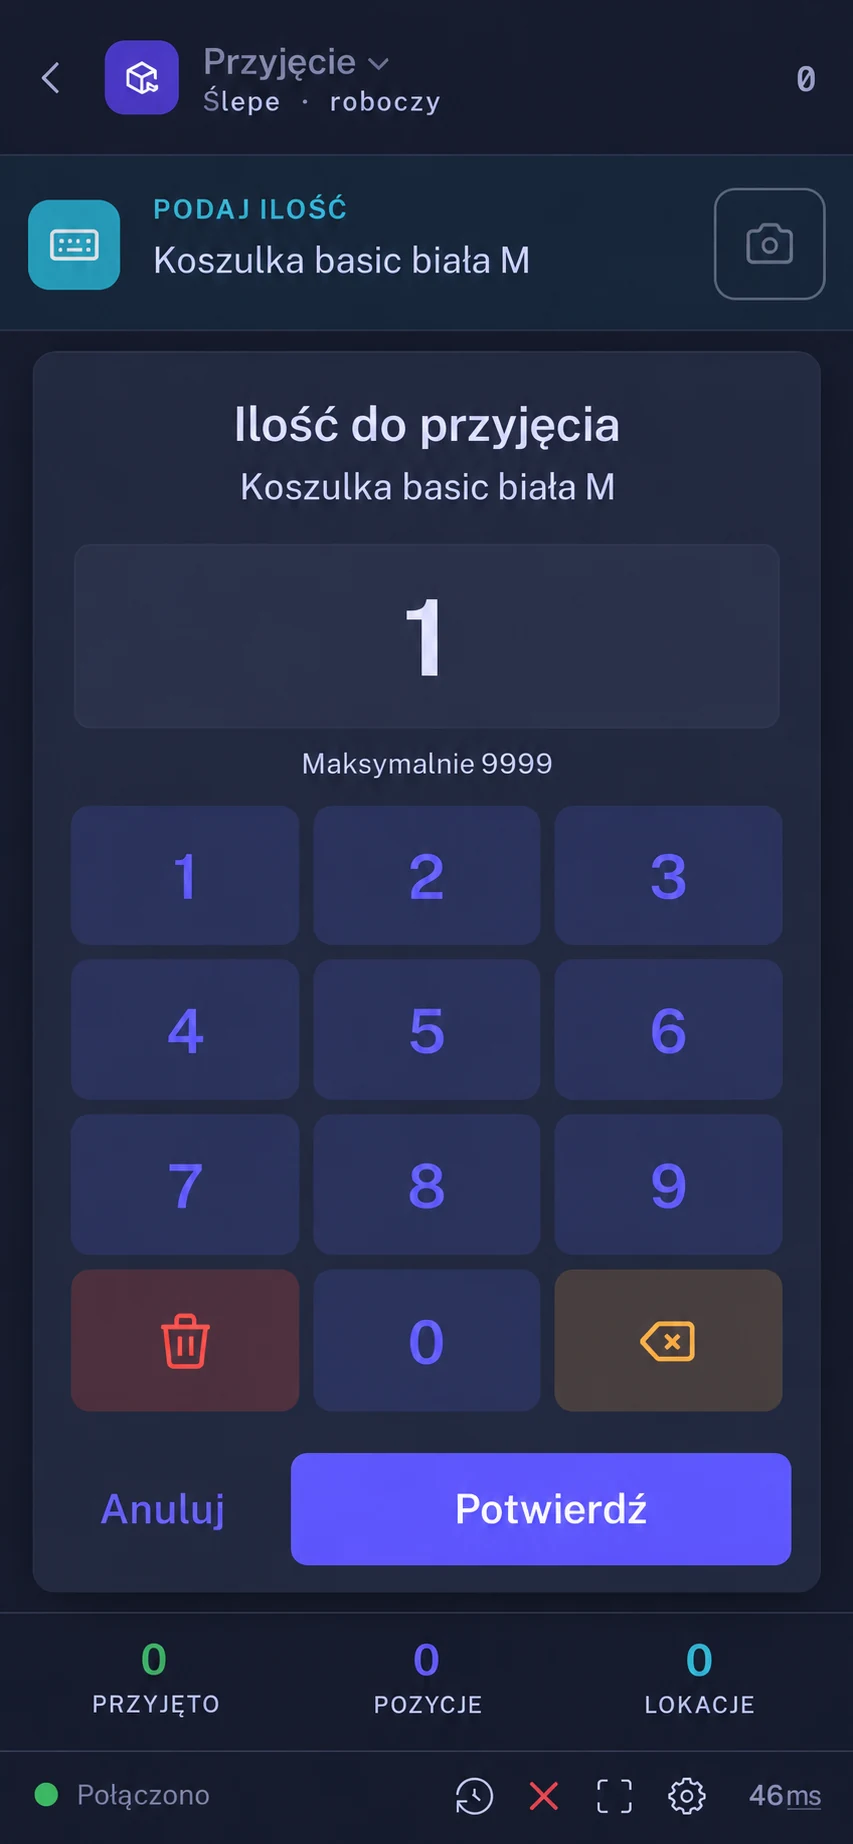
Start a goods receipt with or without a prepared delivery list. Scan the product on the handheld, enter the quantity and select a location. The system records the received stock and where it was put away.
Choose a prepared delivery or start a receipt without advance notice.
The code identifies the product, and the worker enters the quantity to receive.
Scanning a location links the received stock to a specific place in the warehouse.
For an advised delivery, compare received and expected quantities and review the differences.
Replenishment
Set minimum and target stock levels for a shelf. When stock reaches the minimum, the system creates a task to move goods from reserve stock. Managers see tasks in the panel, and warehouse staff carry them out with a handheld.
The manager checks the product, source and destination locations, quantity and task status. Staff start the session on their handheld.
Replenishment with a handheld
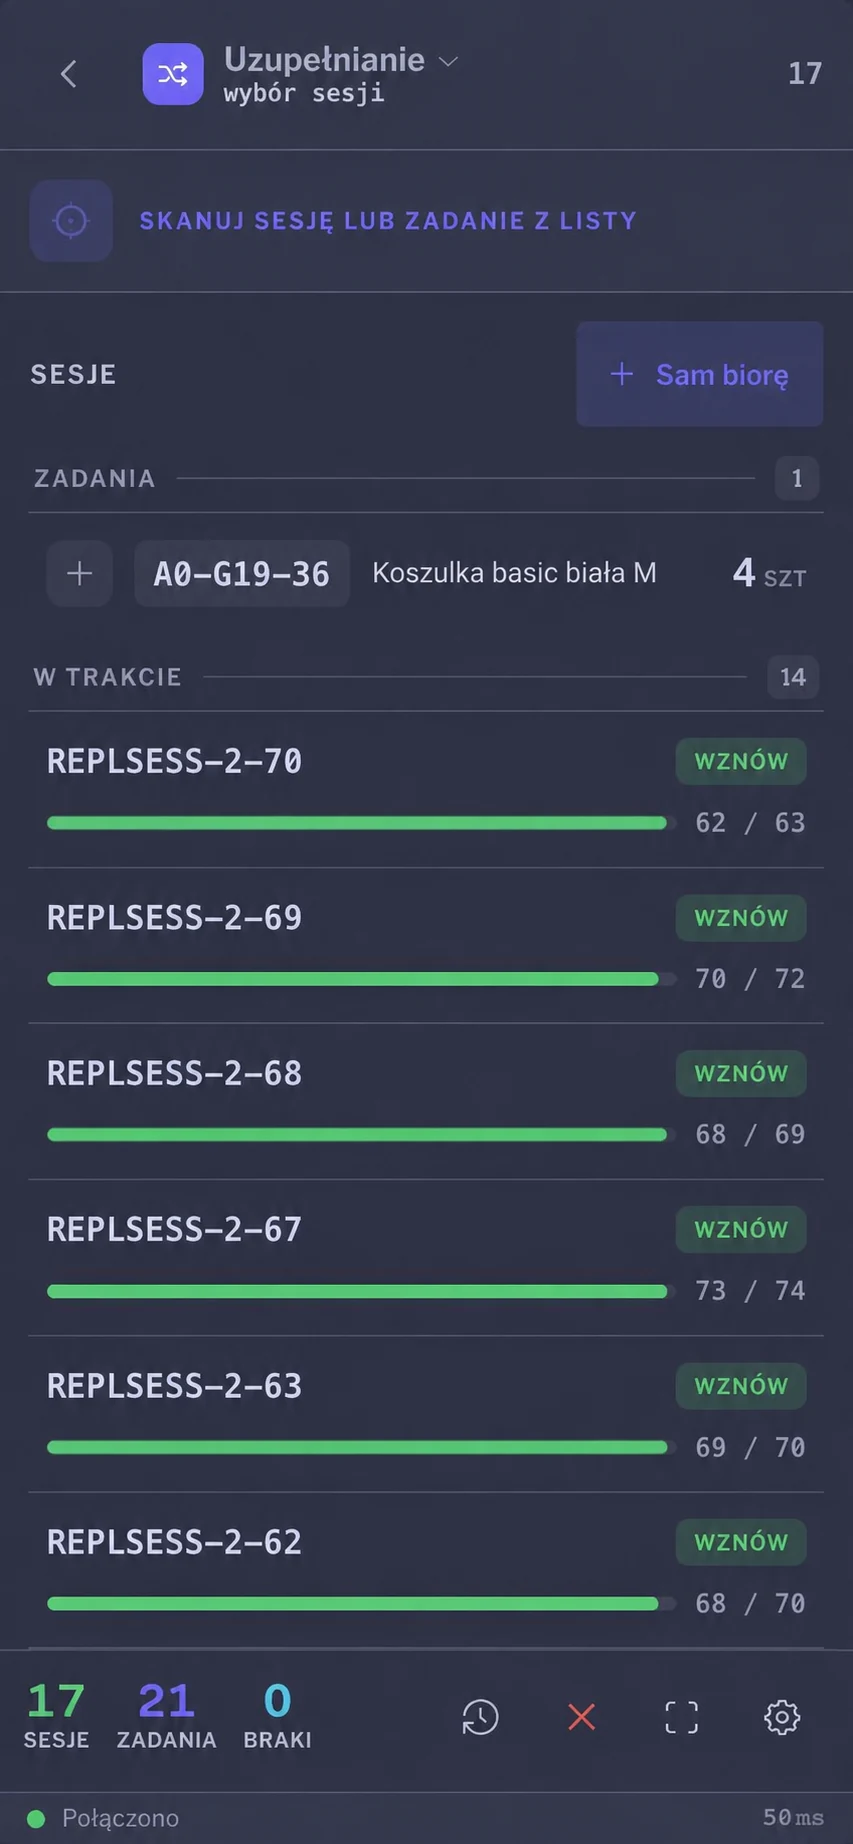
A session is a set of replenishment tasks. Staff select it from the list or scan its code. Each session shows progress, and work already started has a Resume button.
Scan the session or task code, or select an item from the on-screen list.
The Resume button lets you continue a session. Its counter shows completed and remaining tasks.
The progress bar and summary of sessions, tasks and shortages help you see how much work remains.
Picking with a handheld
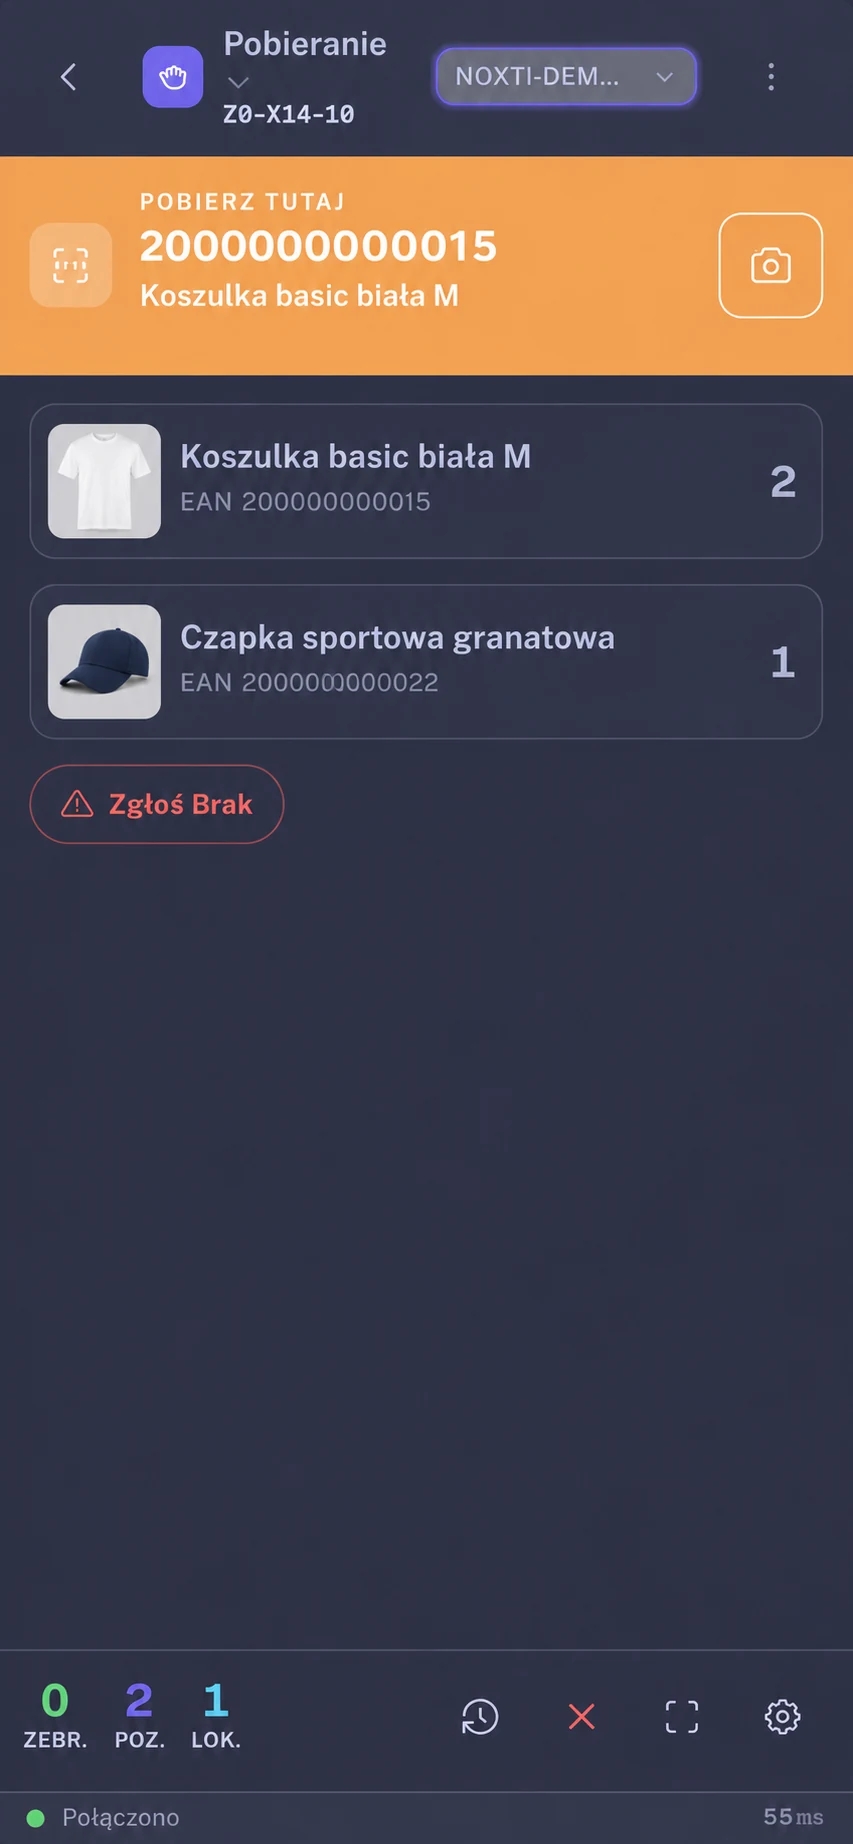
Staff see the location code, product photo and required quantity. They scan the product code, and the system records the pick and updates the counters.
In this example, staff are at location Z0-X14-10. The list contains two products: two units of the first and one of the second.
After scanning the first unit, its remaining quantity drops from two to one. The summary shows one unit picked.
The “Na wózku” (on the cart) section shows products that have been picked but not yet put down. It helps staff check what they need to hand over.
From shelf to parcel
Staff follow instructions on their device and confirm each action by scanning, rather than looking up products on a paper list.
The system shows the location and product to pick. The location sequence determines the picking route.
A scan confirms the pick, a counter helps check the quantity, and a sound signals a valid scan or an error.
When picking with a cart, goods go onto the shelf assigned to the order. With individual picking, you separate goods in the sorting area.
At the packing station, you verify products by scanning, choose packaging and prepare the carrier label.
A shortage or discrepancy on the shelf? Staff mark the location for checking, and the system sends it for counting.
Sorting on the handheld
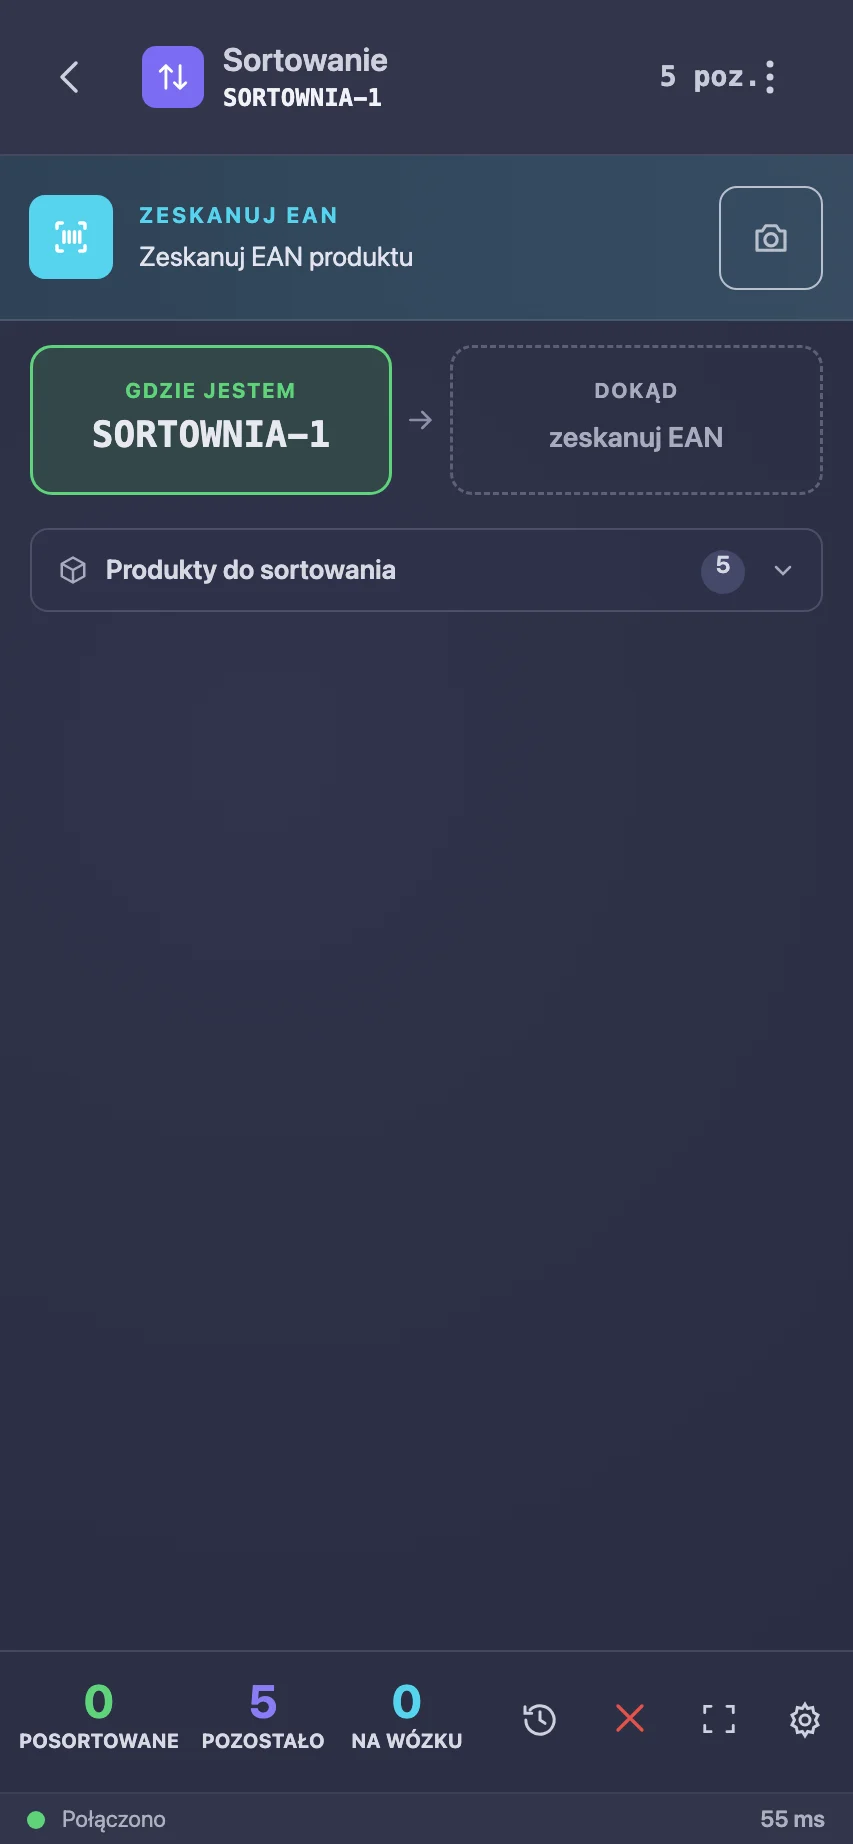
When you pick goods for many orders in one pass, they go to the sorting area. The worker scans the product's EAN code, and the handheld shows which order it belongs to and where to put it.
In the example, the T-shirt belongs to a multi-item order, so it goes to shelf SORT-A-04. The screen also lists other products from that order.
A multi-item order goes to a shelf, a single-item one to a basket. One shelf holds one order, so goods do not get mixed up.
After confirmation, the sorted count goes up and the remaining count goes down. The screen keeps a confirmation of the last product put away.
Packing with scanning
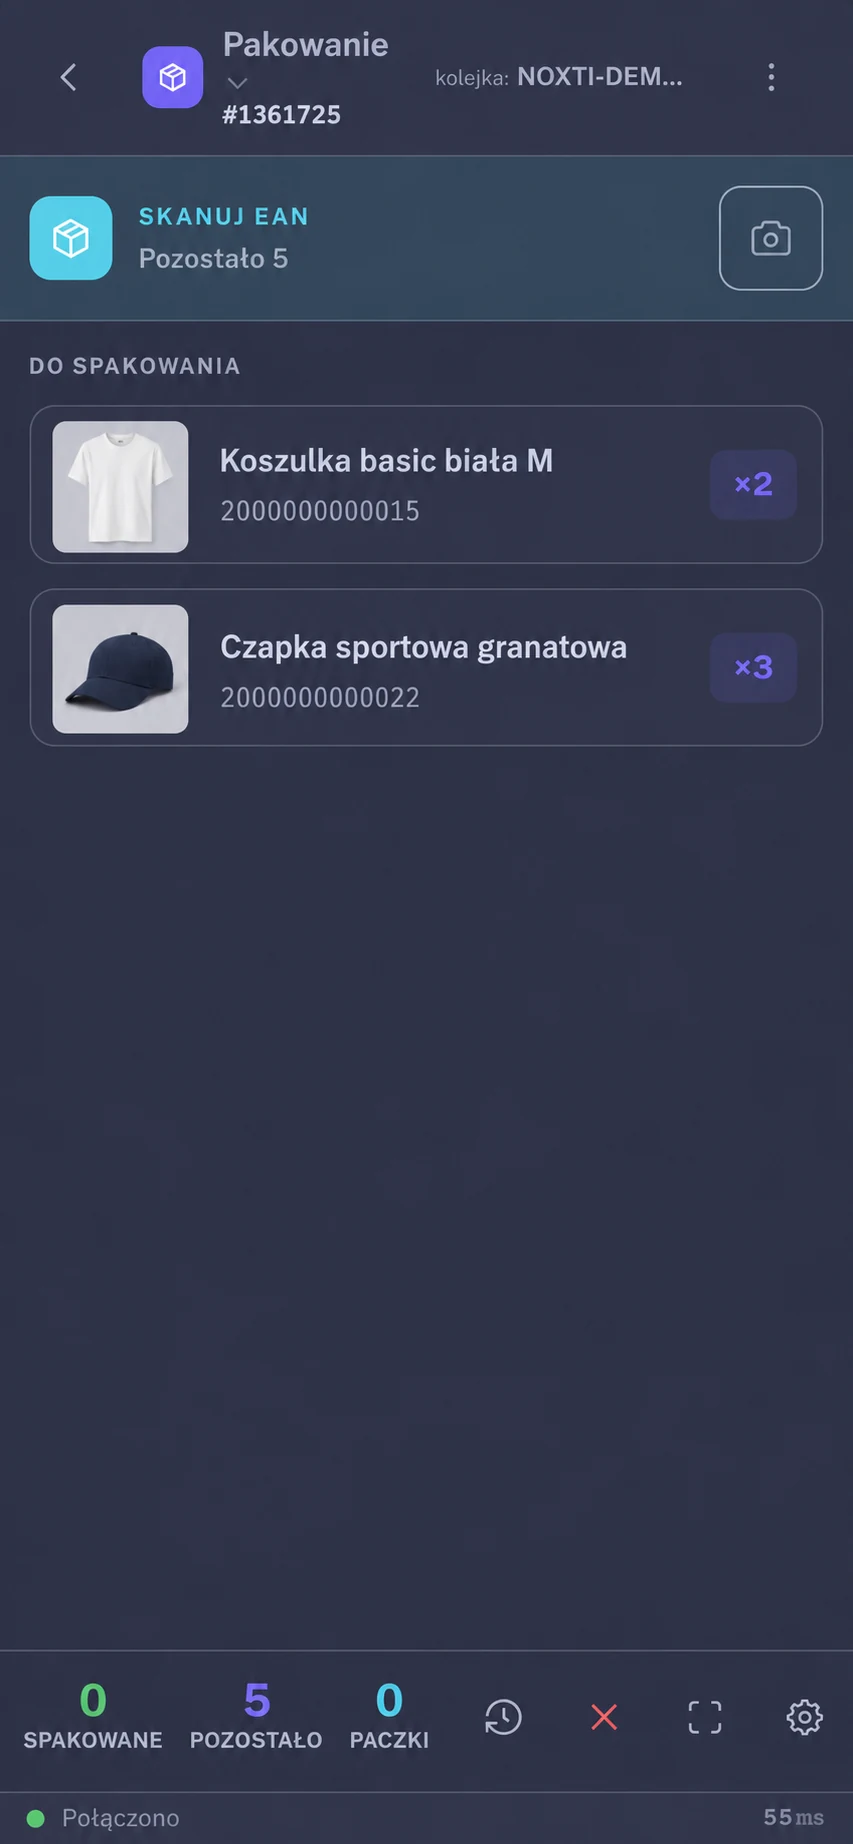
Scan the order basket to display the products to pack. Each scan confirms a unit and reduces the number remaining.
The demo basket contains two products and five units. The screen shows EAN codes and the quantity of each product.
After the first scan, the remaining quantity drops from five to four. The Packed section shows one confirmed item.
After checking the contents, choose packaging and prepare the label for the configured shipping method.
Parcels ready for dispatch
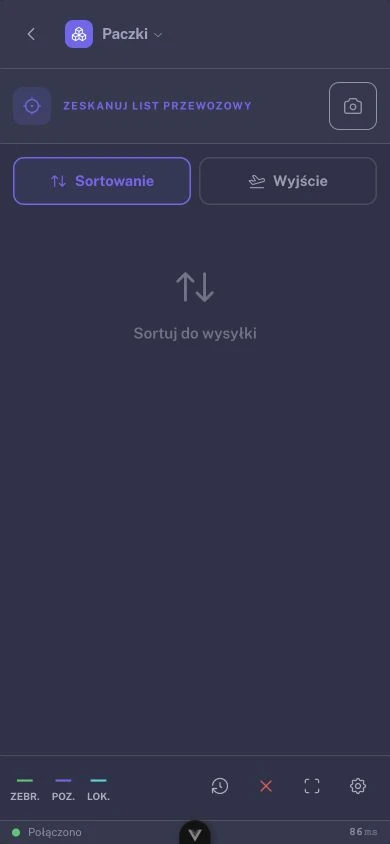
Check the contents during packing. Handle ready shipments in Parcels mode: scanning a number helps identify the carrier and sort the parcel for collection.
The carrier name appears after scanning. The screen also shows whether identification comes from a shipment record or a number pattern.
Employees see which carrier handles each parcel and can sort ready shipments at the dispatch station.
In Dispatch mode, a scan records the parcel leaving. Check its history to see when the shipment left the warehouse.
This example identifies a carrier from a fictional number. Recognising a number pattern alone does not confirm that a shipment has been booked.
Stock moves on the scanner
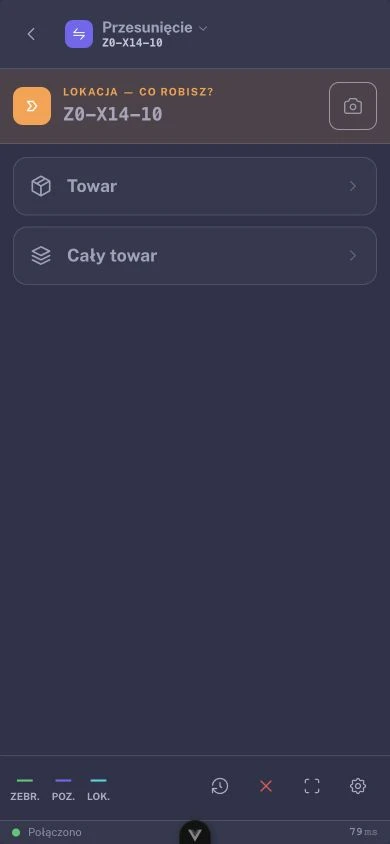
Scan the source location and choose whether to move individual products or all stock. Confirming placement links the products to their new warehouse location.
Scanning a location opens the available actions. In this example, the employee selects Goods at shelf Z0-X14-10.
Scan the products you pick up. The counter shows units and the number of different products carried by the employee.
The destination location identifies where the goods go. The system records the move so the next employee can find the product at its new location.
You can also move all stock from a location or take ready baskets to packing. Available actions depend on location type and permissions.
Stocktaking
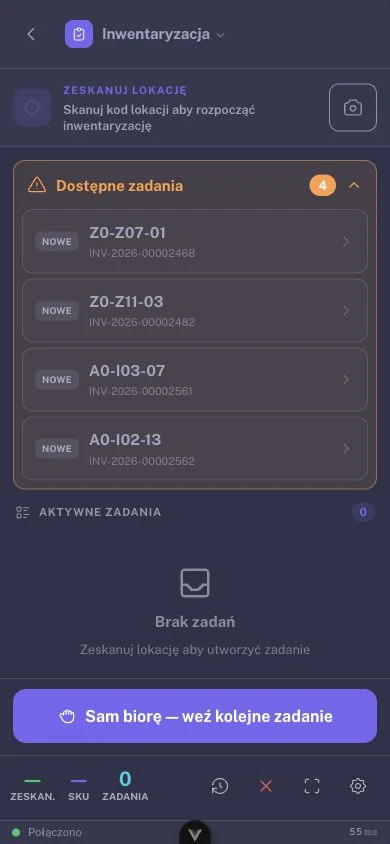
Staff select a task or scan a location and count products. The office reviews discrepancies. In settings, you define which results need approval and which the system can accept automatically.
The screen shows the location code and task number. Staff can select a task from the list or start by scanning a location.
Stock lookup on the handheld
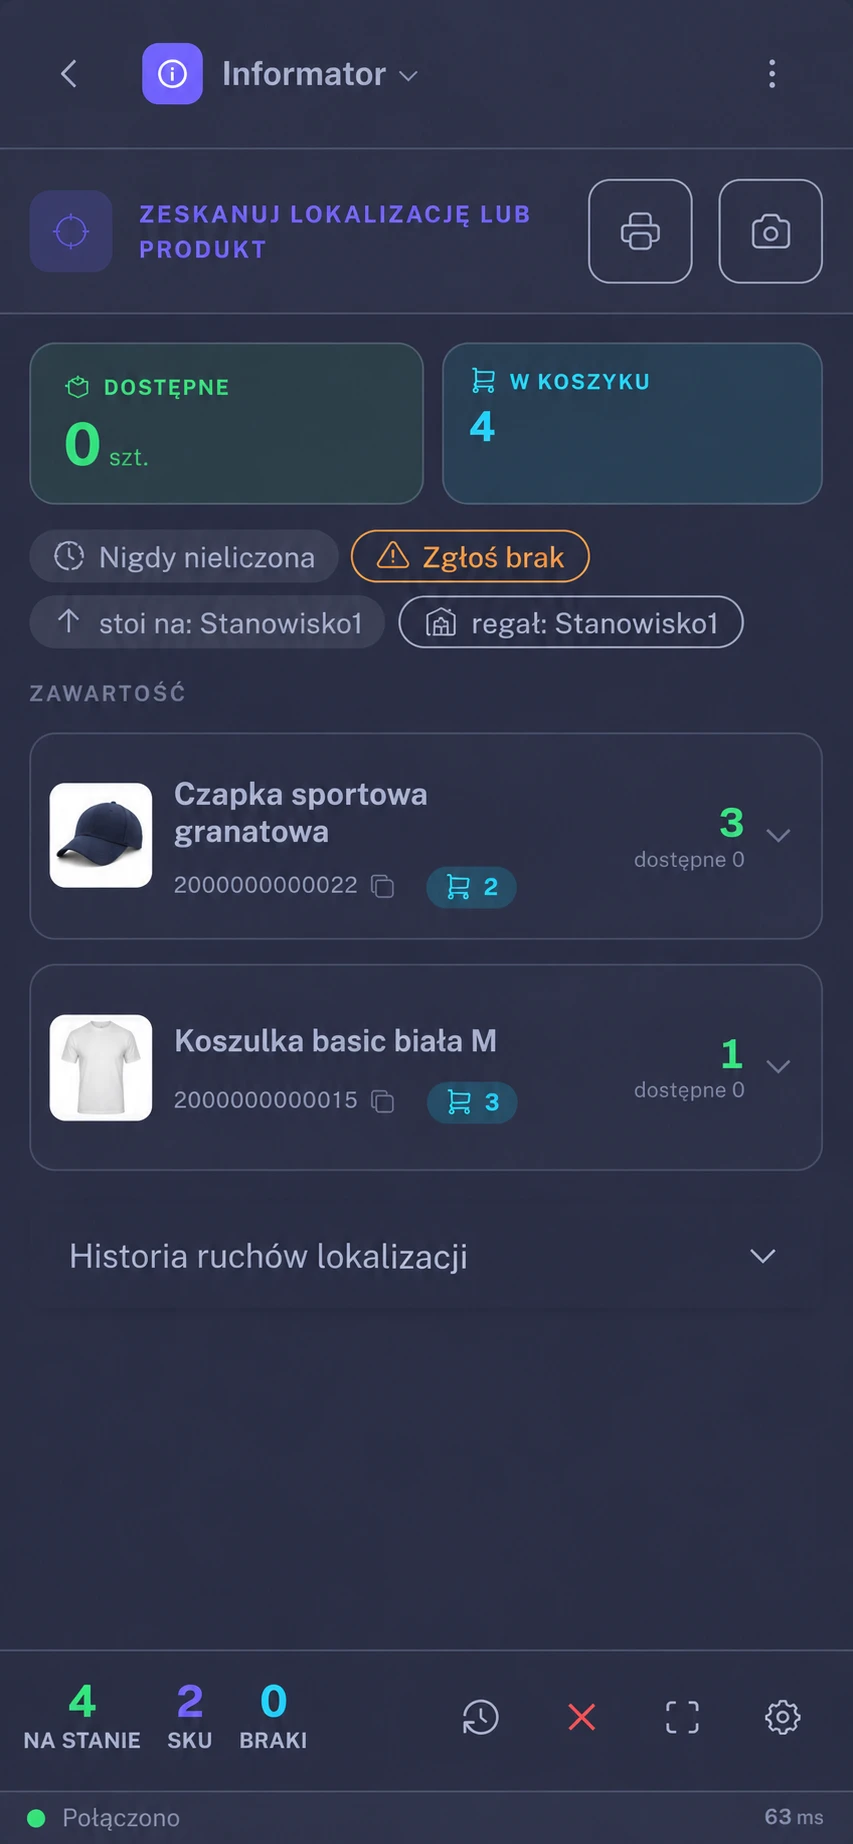
The worker scans a location to see its contents, available quantities and reservations. They can check stock on the spot without looking up information on an office computer.
A product list with photos, codes and quantities helps compare the shelf contents with the system records.
See how much stock is available and how much is already reserved for orders.
Check the location movement history. If the shelf stock does not match, report a shortage from the handheld.
More scanner functions
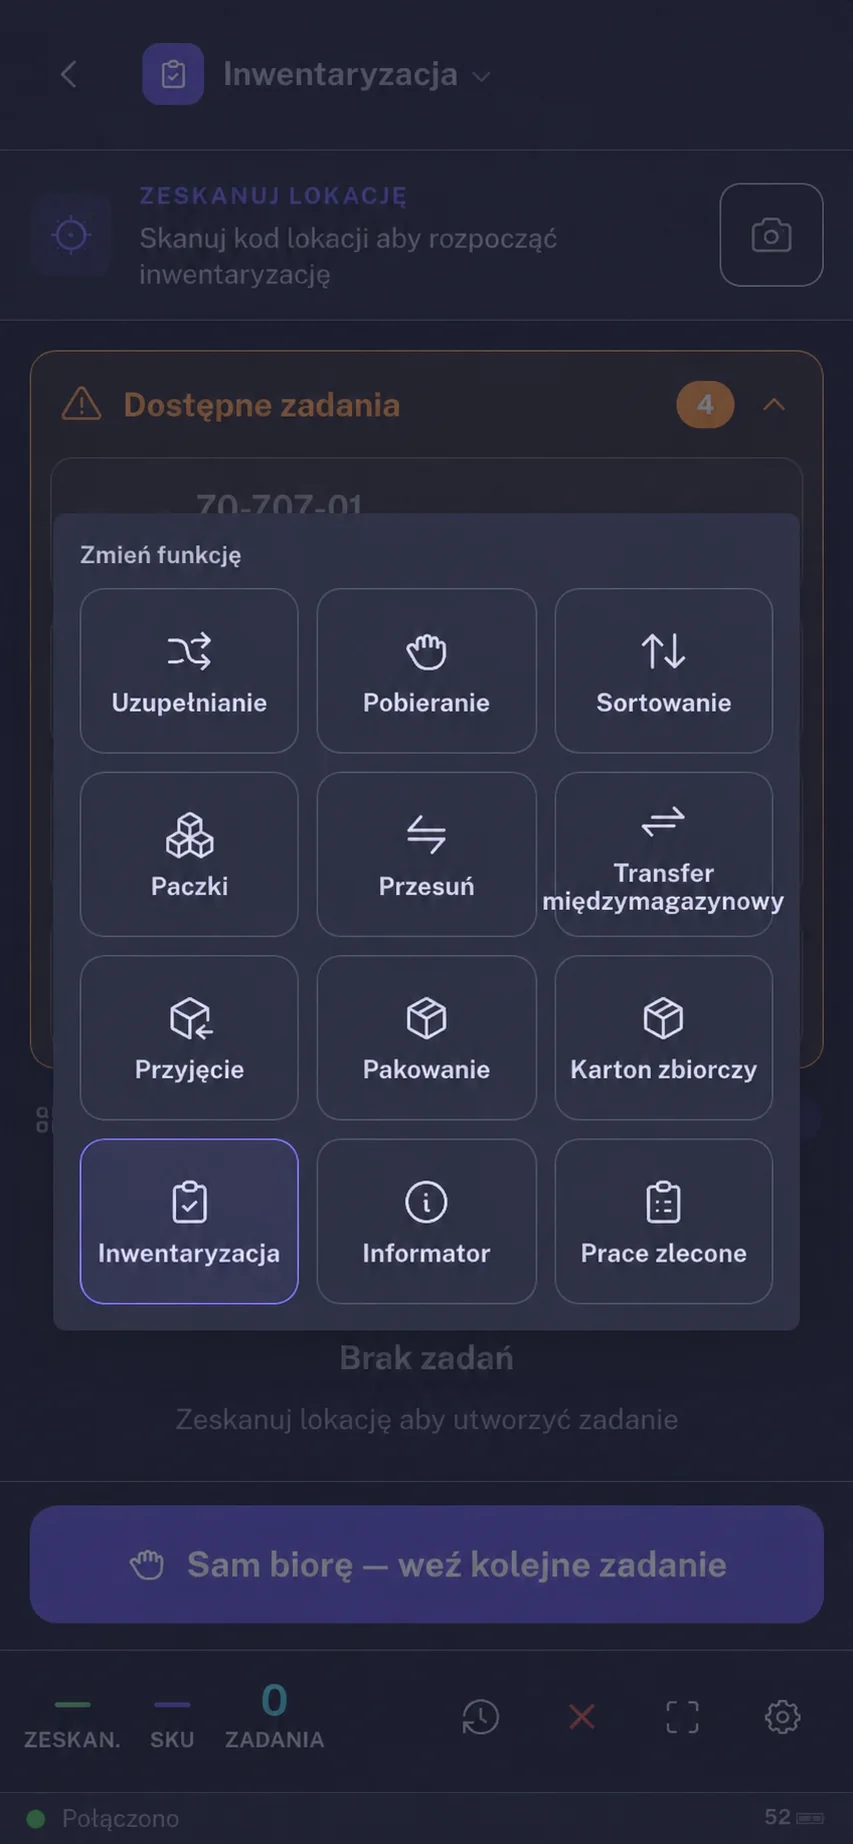
From sorting goods to dispatching parcels, employees select the function they need on their device. Access to individual activities depends on their permissions.
Separate picked goods into orders. Scan the product and basket or shelf to confirm where you place each item.
Move individual products or all stock between locations. Scans identify the source and destination. You can also move ready baskets to packing.
Choose the destination warehouse, scan products to pick them up and confirm their placement at the new location.
Scan a shipment number to identify the carrier and sort parcels for collection. Dispatch mode records the parcel leaving the warehouse.
Prepare a master carton for a partner and choose its carrier and size. In parcel handling, assign smaller shipments to it.
Record the time and description of assigned work outside scanning, along with the person who requested it. The manager reviews and approves the entry.
See the system at work
See how to prepare warehouse work, configure fulfilment and track progress. The video shows the system using sample data.
Fulfilment profile
Work straight from the shelf to packing or separate picking, sorting and handover. The system records the workflow even when you skip a selected stage.
The operator carries picked goods on their own carrier, or puts them straight onto the cart shelf assigned to the order.
Splitting goods across orders: EAN by EAN, automatically when a basket is dropped, or not at all.
Handing the basket or shelf over to the packing station, unless the goods travel there on the cart.
Verifying the order contents, choosing the box, printing the carrier label and confirming the consignment.
A profile cannot be swapped mid-work: while a queue still holds unfinished orders, the rules stay as they were when the shift began.
Path of the goods
No handheld: you open the order, pick the products from the list and pack them. You create the carrier label on the order page. No scan checks the contents.
Goods from the whole route travel together and are split only in the sorting area: single-item orders into baskets, the rest onto shelves.
Sorting happens while picking, so the cart goes straight to packing. At the station the operator scans the shelf, not the cart.
One cart serves one queue. Assigning an operator another queue does not bolt it onto the route of the cart already in their hands.
Around fulfilment
Warehouse statuses of an order
We agree the scope of an implementation against your process. Route optimisation, pick waves, FIFO/FEFO, serial numbers and robotics need separate confirmation.
Tell us how picking and packing work today. In the demo we will set a fulfilment profile to match and take an order from the queue to the consignment note.